Objectives
Introduce Sessions onto the Playlist application, enabling user accounts and cookie-based authentication.
Exercises Solutions
This lab requires that the playlist-3 lab be completed. If you have lost your solution, create a new project in Glitch by cloning this repo:
Instructions on how to do this are here. Remember to use the url above.
Exercise 1: Display Durations
Make sure the duration of each song and playlist is visible on the UX
views/partials/listsongs.hbs
<table class="ui table">
  <thead>
    <tr>
      <th>Song</th>
      <th>Artist</th>
      <th>Duration</th>
      <th></th>
    </tr>
  </thead>
  <tbody>
    {{#each playlist.songs}}
      <tr>
        <td>
          {{title}}
        </td>
        <td>
          {{artist}}
        </td>
        <td>
          {{duration}}
        </td>
        <td>
          <a href="/playlist/{{../playlist.id}}/deletesong/{{id}}" class="ui icon button">
            <i class="icon trash"></i>
          </a>
        </td>
      </tr>
    {{/each}}
  </tbody>
</table>
views/partials/listplaylists.hbs
{{#each playlists}}
  <section class="ui stacked segment">
    <h2 class="ui header">
      {{title}}
    </h2>
    <p> Total Duration: {{duration}} </p>
    <a href="/playlist/{{id}}" class="ui icon button">
      <i class="icon folder open"></i>
    </a>
    <a href="/dashboard/deleteplaylist/{{id}}" class="ui icon button">
      <i class="icon trash"></i>
    </a>
  </section>
{{/each}}
Exercise 2: Add Song Duration
Modify the add song form to accept a song duration as well as title and artist:
views/partials/addsong.hbs
<form class="ui stacked segment form" action="/playlist/{{playlist.id}}/addsong" method="POST">
  <div class="two fields">
    <div class="field">
      <label>Title</label>
      <input placeholder="Title" type="text" name="title">
    </div>
    <div class="field">
      <label>Artist</label>
      <input placeholder="Artist" type="text" name="artist">
    </div>
    <div class="field">
      <label>Duration</label>
      <input placeholder="00" type="number" name="duration">
    </div>
  </div>
  <button class="ui blue submit button">Add Song</button>
</form>
controllers/playlist.js
In the playlist addSong method, include the the duration field, reading it from the form:
    const newSong = {
      id: uuid(),
      title: request.body.title,
      artist: request.body.artist,
      duration: Number(request.body.duration),
    };
This is the complete addSong method:
  addSong(request, response) {
    const playlistId = request.params.id;
    const playlist = playlistStore.getPlaylist(playlistId);
    const newSong = {
      id: uuid(),
      title: request.body.title,
      artist: request.body.artist,
      duration: Number(request.body.duration),
    };
    logger.debug("New Song = ", newSong);
    playlistStore.addSong(playlistId, newSong);
    response.redirect("/playlist/" + playlistId);
  }
Verify that you can add songs with duration now.
Exercise 3: Active Duration
The durations in each playlist are just constants stored in the database. Currently, if you add a new playlist + songs, then the duration in the playlist will be undefined.
Change this now, such that when you add a song to a playlist the duration displayed on the dashboard for each playlist will be the actual sum of the donations for all songs in the playlist.
models/playlist-store.json
...
  addSong(id, song) {
    const playlist = this.getPlaylist(id);
    playlist.songs.push(song);

    let duration = 0;
    for (let i = 0; i < playlist.songs.length; i++) {
      duration += playlist.songs[i].duration;
    }

    playlist.duration = duration;
    this.store.save();
  },
...
Now see if the durations are an accurate summary of all the song's duration.
Playlist Model
If your project has any playlists in the json store, delete them now. Your store should look like this:
models/playlist-store.json
{
  "playlistCollection": [
  ]
}
You can do this via the UX, or you can just delete them from playlist-store.json directly.
This has completely emptied our application of data. We are doing this as we are about to make some changes to how the store is represented.
We need a new method in the playlist-store module, which will retrieve a playlist based on a specific user id.
models/playlist-store.js
...
  getUserPlaylists(userid) {
    return this.store.findBy(this.collection, { userid: userid });
  },
...
This new method takes a userid, and will only fetch playlists belonging to the user with the specific id. We have'nt introduced the User model yet - nor are we storing playlists with such an id. We will make these changes in the next steps...
UserStore
Now we can introduce a new module to manage a user store:
models/user-store.js
'use strict';

const _ = require('lodash');
const JsonStore = require('./json-store');

const userStore = {

  store: new JsonStore('./models/user-store.json', { users: [] }),
  collection: 'users',

  getAllUsers() {
    return this.store.findAll(this.collection);
  },

  addUser(user) {
    this.store.add(this.collection, user);
    this.store.save();
  },

  getUserById(id) {
    return this.store.findOneBy(this.collection, { id: id });
  },

  getUserByEmail(email) {
    return this.store.findOneBy(this.collection, { email: email });
  },
};

module.exports = userStore;
We can manually create some user objects in a new user-store.json file:
models/user-store.json
{
  "users": [
    {
      "firstName": "homer",
      "lastName": "simpson",
      "email": "homer@simpson.com",
      "password": "secret",
      "id": "3ad52697-6d98-4d80-8273-084de55a86c0"
    },
    {
      "firstName": "marge",
      "lastName": "simpson",
      "email": "marge@simpson.com",
      "password": "secret",
      "id": "2b6f0989-7b7f-4a38-ad26-aa06b922d751"
    }
  ]
}
In the above we are pre-loading two users for test purposes. We will use these user objects in the next steps...
Accounts views
We need a suite of new views to support signup / login.
First of all a new landing page - inviting the visitors to either sign up or log in:
views/index.hbs
{{> welcomemenu }}

<section class="ui center aligned middle aligned segment">
  <p> Sign up or Log in... </p>
</section>
This view requires the following new menu partial:
views/partials/welcomemenu.hbs
<nav class="ui menu">
<header class="ui header item"> <a href="/"> Playlist 4 </a></header>
<div class="right menu">
<a id="signup" class="item" href="/signup"> Signup </a>
<a id="login" class="item" href="/login"> Login </a>
</div>
</nav>
<script>
$("#{{id}}").addClass("active item");
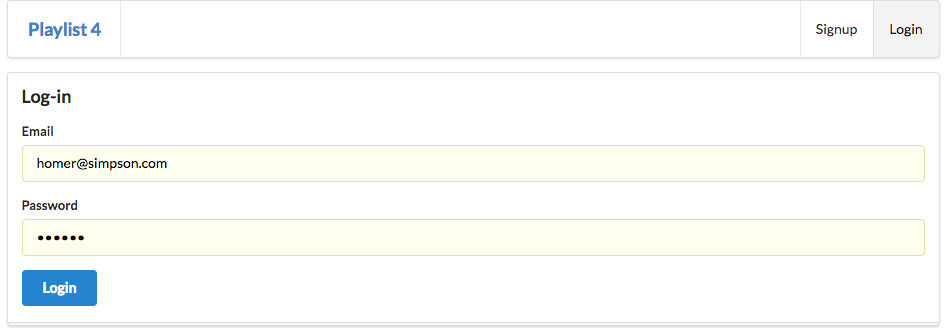
</script>This is a new login view:
views/login.hbs
{{> welcomemenu id='login' }}
<form class="ui stacked segment form" action="/authenticate" method="POST">
<h3 class="ui header">Log-in</h3>
<div class="field">
<label>Email</label> <input placeholder="Email" name="email">
</div>
<div class="field">
<label>Password</label> <input type="password" name="password">
</div>
<button class="ui blue submit button">Login</button>
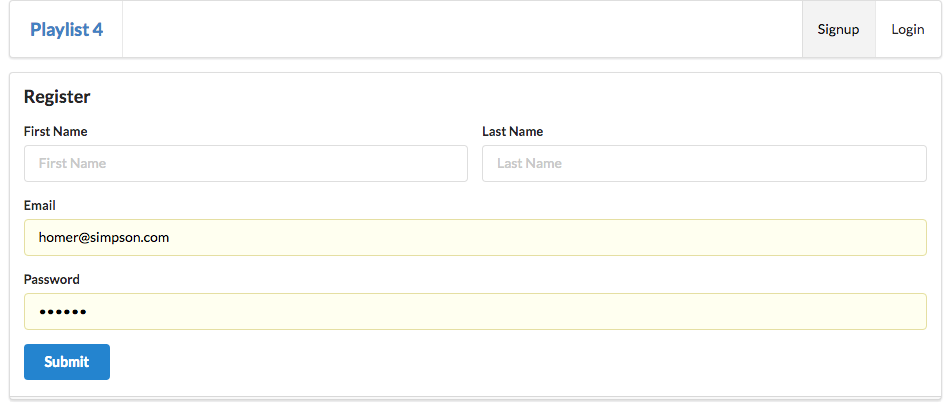
</form>... and this is a sign up view:
views/signup.hbs
{{> welcomemenu id="signup"}}

<form class="ui stacked segment form" action="/register" method="POST">
  <h3 class="ui header">Register</h3>
  <div class="two fields">
    <div class="field">
      <label>First Name</label>
      <input placeholder="First Name" type="text"  name="firstName">
    </div>
    <div class="field">
      <label>Last Name</label>
      <input placeholder="Last Name" type="text"  name="lastName">
    </div>
  </div>
  <div class="field">
    <label>Email</label>
    <input placeholder="Email" type="text" name="email">
  </div>
  <div class="field">
    <label>Password</label>
    <input type="password" name="password">
  </div>
  <button class="ui blue submit button">Submit</button>
</form>
We will adjust the controllers in the next steps to use these views...
Accounts controller
This is a new controller to support these views:
controllers/accounts
'use strict';

const userstore = require('../models/user-store');
const logger = require('../utils/logger');
const uuid = require('uuid');

const accounts = {

  index(request, response) {
    const viewData = {
      title: 'Login or Signup',
    };
    response.render('index', viewData);
  },

  login(request, response) {
    const viewData = {
      title: 'Login to the Service',
    };
    response.render('login', viewData);
  },

  logout(request, response) {
    response.cookie('playlist', '');
    response.redirect('/');
  },

  signup(request, response) {
    const viewData = {
      title: 'Login to the Service',
    };
    response.render('signup', viewData);
  },

  register(request, response) {
    const user = request.body;
    user.id = uuid();
    userstore.addUser(user);
    logger.info(`registering ${user.email}`);
    response.redirect('/');
  },

  authenticate(request, response) {
    const user = userstore.getUserByEmail(request.body.email);
    if (user) {
      response.cookie('playlist', user.email);
      logger.info(`logging in ${user.email}`);
      response.redirect('/dashboard');
    } else {
      response.redirect('/login');
    }
  },

  getCurrentUser(request) {
    const userEmail = request.cookies.playlist;
    return userstore.getUserByEmail(userEmail);
  },
};

module.exports = accounts;
This will enable new users to sign up and existing users to log in. It makes use of
- the views introduced in the last step
- the user-store module
- the cookie mechanism
to create and manage user interaction with the application.
Routes
To support the users, we need a new set of routes:
routes.js
First, import the accounts module towards the top if the routes file:
...
const accounts = require('./controllers/accounts.js');
...
Then we can append these new routes:
...
router.get('/', accounts.index);
router.get('/login', accounts.login);
router.get('/signup', accounts.signup);
router.get('/logout', accounts.logout);
router.post('/register', accounts.register);
router.post('/authenticate', accounts.authenticate);
...
We also need to remove this existing route, as we are replacing it:
router.get("/", dashboard.index);This is the complete revised routes.js
'use strict';

const express = require('express');
const router = express.Router();

const dashboard = require('./controllers/dashboard.js');
const about = require('./controllers/about.js');
const playlist = require('./controllers/playlist.js');
const accounts = require('./controllers/accounts.js');

router.get('/', accounts.index);
router.get('/login', accounts.login);
router.get('/signup', accounts.signup);
router.get('/logout', accounts.logout);
router.post('/register', accounts.register);
router.post('/authenticate', accounts.authenticate);

router.get('/dashboard', dashboard.index);
router.get('/dashboard/deleteplaylist/:id', dashboard.deletePlaylist);
router.post('/dashboard/addplaylist', dashboard.addPlaylist);

router.get('/about', about.index);
router.get('/playlist/:id', playlist.index);
router.get('/playlist/:id/deletesong/:songid', playlist.deleteSong);
router.post('/playlist/:id/addsong', playlist.addSong);

module.exports = router;
Finally, in order to support the logout feature, we need to add a new option to the main menu:
views/partials/menu.hbs
<nav class="ui menu">
  <header class="ui header item"> <a href="/"> Playlist 4 </a></header>
  <div class="right menu">
    <a id="dashboard" class="item" href="/dashboard"> Dashboard  </a>
    <a id="about" class="item" href="/about"> About </a>
    <a id="logout" class="item" href="/logout"> Logout </a>
  </div>
</nav>

<script>
  $("#{{id}}").addClass("active item");
</script>
The application should be running now. You should see these new views:
A new landing page

Signup
login
Dashboard
Try the following now:
- Log in as 'homer@simpson', 'secret'.
- Add a playlist called 'Homers First List'.
- logout
- Log in as 'marge@simpson', 'secret'.
Notice that we are seeing Homers test playlist even when we log in as marge? The playlist-store.json may look like this:
{
  "playlistCollection": [
    {
      "id": "4a1ea4ec-303e-4b13-bd98-a6b04877e093",
      "title": "Homers First List",
      "songs": []
    }
  ]
}
(Glitch will probably not show the above - as the editor currently doesnt render the files accurately if they have been modified by another process. You should see the above, though, if you are running the app in Webstorm.)
We should only present the users with their own playlist - Marge should NOT be able to see Homers' list (as is currently the case).
Here is how we do it - all changes to the dashboard module:
controller/dashboard.js
In the top of the module, import the new accounts module:
...
const accounts = require ('./accounts.js');
...
Revised addPlaylist action:
...
  addPlaylist(request, response) {
    const loggedInUser = accounts.getCurrentUser(request);
    const newPlayList = {
      id: uuid(),
      userid: loggedInUser.id,
      title: request.body.title,
      songs: [],
    };
    logger.debug('Creating a new Playlist', newPlayList);
    playlistStore.addPlaylist(newPlayList);
    response.redirect('/dashboard');
  },
...
Notice we find out who the logged in user is and then make sure that users ID is stored with the playlist.
Revised index action:
...
  index(request, response) {
    logger.info('dashboard rendering');
    const loggedInUser = accounts.getCurrentUser(request);
    const viewData = {
      title: 'Playlist Dashboard',
      playlists: playlistStore.getUserPlaylists(loggedInUser.id),
    };
    logger.info('about to render', playlistStore.getAllPlaylists());
    response.render('dashboard', viewData);
  },
...
Notice in the above we are first finding out how the currently logged in user is - and then we are using that users id to get the correct playlists.
Log in again as marge and homer in turn, creating a single playlist (use a name you will remember). Make sure that the appropriate playlist appears in each users dashboard.
The Stores
Looking at the playlist-store.json - it might (eventually when loaded) look something like this:
{
  "playlistCollection": [
    {
      "id": "1e6ed5a0-28fe-4527-8ce8-6cb5c800b5be",
      "userid": "2b6f0989-7b7f-4a38-ad26-aa06b922d751",
      "title": "marges playlist",
      "songs": []
    },
    {
      "id": "07dd66fe-9f8f-456c-944d-48330bde4610",
      "userid": "3ad52697-6d98-4d80-8273-084de55a86c0",
      "title": "homers playlist",
      "songs": []
    }
  ]
}
Each playlist has and id + a userid, which identifies the user how 'owns' the playlist.
Exercise
This is the completed archive at this stage:
Exercise 1
Test the application more comprehensively - signing up a range of users, and creating playlists. Make sure the users only see the playlists they have created.
Exercise 2
Look at the authenticate method again:
  authenticate(request, response) {
    const user = userstore.getUserByEmail(request.body.email);
    if (user) {
      response.cookie('playlist', user.email);
      logger.info(`logging in ${user.email}`);
      response.redirect('/dashboard');
    } else {
      response.redirect('/login');
    }
  },
Can you see anything not quite right about it?
Hint: what happens if incorrect password entered? Try this now.
See if you can fix this problem - i.e. only allow user to log in if they provide correct password.