Objectives
classes · methods · behaviour · overloading · validation · this · encapsulation · access modifiers · accessors · mutators
Adding behaviour (methods) to Spot
We have seen how the fields are used in classes (i.e. xCoord, yCoord, diameter). We now look at the behaviour (methods) in classes.
Note: The version of Spot below doesn't enforce the encapsulation rules yet. We will implement these rules in SpotV7.0 (consistent with how we did it in lectures). We will bring in Encapsulation in Step04 of this lab when we add the accessors and mutators.
Spot V4.0 - display() method
Create a new Processing sketch in your workspace and call it Spot_Version4_0.
Create a new Spot tab and cut and paste the following code into it:
class Spot{
  float xCoord, yCoord;
  float diameter;

  Spot()
  {
  }

 Spot(float xPos, float yPos, float diamtr)
 {
    xCoord = xPos;
    yCoord = yPos;
    diameter = diamtr;
  }

}
Then write this new method into the above class:
  void display()
  {
    ellipse(xCoord, yCoord, diameter, diameter);
  }
In the main tab, cut and paste the following code into it:
Spot sp;

void setup()
{
  size (100,100);
  noStroke();
  sp = new Spot(33, 50, 30);
}

void draw()
{
  background(0);
  sp.display();
}
Run your code. You should get the following output:
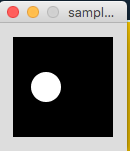
Save your work (don't close the project though).
Adding behaviour (methods) to Spot
We will continue looking at the behaviour (methods) in classes.
Note: The version of Spot below doesn't enforce the encapsulation rules yet. We will implement these rules in SpotV7.0 (consistent with how we did it in lectures). We will bring in Encapsulation in Step04 of this lab when we add the accessors and mutators.
Spot V5.0 - colour() method
Save your Spot_Version4_0 as Spot_Version5_0.
Add the following fields to the Spot class
int red, green, blue, gray;Type in the following colour() method code to the Spot class:
void colour(int redVal, int greenVal, int blueVal)
  {
    red = redVal;
    green = greenVal;
    blue = blueVal;
    fill (red, green, blue);
  }
and then in the main tab, refactor the draw() method to:
void draw()
{
  background(0);
  sp.colour(255,10,20);
  sp.display();
}
Run the code.
Your output should now look like:
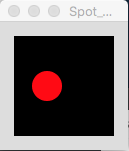
Save your work (don't close the project though).
Spot V5.1 - Adding a second (overloaded) colour() method
Save your Spot_Version5_0 work as Spot_Version5_1.
Type the following extra method code in your Spot class:
 void colour(int grayVal)
  {
    gray = grayVal;
    fill (gray);
  }
Now we want to call this extra method, so you need to change the draw method in the main tab:
void draw()
{
  background(0);
  sp.colour(125);
  sp.display();
}
Run the code.
Your output should now look like:
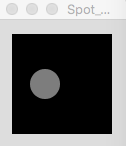
Can you explain why the output is different from the previous output.
Save your work (don't close the project though).
Spot V5.2 - Adding another constructor (to introduce a grayscale starting colour)
Save your Spot_Version5_1 work as Spot_Version5_2.
Type in the following extra method code in your Spot class:
 Spot(float xPos, float yPos, float diamtr, int grayVal)
   {
     xCoord = xPos;
     yCoord = yPos;
     diameter = diamtr;
     colour(grayVal);
   }
This constructor allows us to define the colour (in grayscale) of the spot when creating the object.
Now we want to call this extra constructor, so you need to change the code in the setup method in the main tab:
Spot sp;

void setup()
{
  size (100,100);
  noStroke();
  sp = new Spot(33, 50, 30, 125);
}

void draw()
{
  background(0);
  sp.display();
}
Your output should now look like:
Can you answer why this is producing the same output as the previous version?
Save your work (don't close the project though).
Spot 5.3 - Adding another constructor (to introduce an r,g,b starting colour)
Save your Spot_Version5_2 work as Spot_Version5_3.
Type in the following extra method code in your Spot class:
 Spot(float xPos, float yPos, float diamtr, int redVal, int greenVal, int blueVal)
   {
     xCoord = xPos;
     yCoord = yPos;
     diameter = diamtr;
     colour(redVal, greenVal, blueVal);
   }
Then refactor your setup method in the main tab like so:
void setup()
{
  size (100,100);
  noStroke();
  sp = new Spot(33, 50, 30, 255,150,50);
}
Run the code.
You should see the a differently coloured spot.
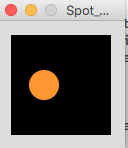
Change the rgb values in the constructor and see how this changes the colour in the spot.
Also use the colour method in the draw() method to change the colour. Will this work? Is this the best use of the constructor?
Note that now, your Spot class should look like:
class Spot{
  float xCoord, yCoord;
  float diameter;
  int red, green, blue, gray;

  Spot()
  {
  }

  Spot(float xPos, float yPos, float diamtr)
  {
     xCoord = xPos;
     yCoord = yPos;
     diameter = diamtr;
   }

   Spot(float xPos, float yPos, float diamtr, int grayVal)
   {
     xCoord = xPos;
     yCoord = yPos;
     diameter = diamtr;
     colour(grayVal);
   }

   Spot(float xPos, float yPos, float diamtr, int redVal, int greenVal, int blueVal)
   {
     xCoord = xPos;
     yCoord = yPos;
     diameter = diamtr;
     colour(redVal, greenVal, blueVal);
   }

   void display()
   {
     ellipse(xCoord, yCoord, diameter, diameter);
   }

   void colour(int redVal, int greenVal, int blueVal)
   {
     red = redVal;
     green = greenVal;
     blue = blueVal;
     fill (red, green, blue);
   }

   void colour(int grayVal)
   {
     gray = grayVal;
     fill (gray);
   }
}
Save your work (don't close the project though).
Spot V6.x
In this step, we will introduce the move method and also start using the this keyword.
Note: The version of Spot below doesn't enforce the encapsulation rules yet. We will implement these rules in SpotV7.0 (consistent with how we did it in lectures). We will bring in Encapsulation in Step04 of this lab when we add the accessors and mutators.
Spot V6.0 - Adding a move() method
Save your Spot_Version5_3 work as Spot_Version6_0.
Type in the following extra method code in your Spot class:
   void move(float xPos, float yPos)
   {
     xCoord = xPos;
     yCoord = yPos;
   }
and then in the main tab, refactor the draw() method to:
Spot sp;

void setup()
{
  size (100,100);
  noStroke();
  sp = new Spot(33, 50, 30, 125);
}

void draw()
{
  background(0);
  sp.display();
  sp.move(mouseX, mouseY);
}
Run the code.
What do you see? Do you understand why it looks like this? If you do not understand, ask your lecturer.
Save your work (don't close the project though).
Spot V6.1 - the this keyword
Save your Spot_Version6_0 work as Spot_Version6_1.
Refactor your Spot class to use the this keyword:
class Spot{

  float xCoord, yCoord;
  float diameter;
  int red, green, blue, gray;

  Spot()
  {
  }

 Spot(float xCoord, float yCoord, float diameter)
 {
    this.xCoord = xCoord;
    this.yCoord = yCoord;
    this.diameter = diameter;
  }

   Spot(float xCoord, float yCoord, float diameter, int gray)
   {
    this.xCoord = xCoord;
    this.yCoord = yCoord;
    this.diameter = diameter;
    colour(gray);
   }

   Spot(float xCoord, float yCoord, float diameter, int red, int green, int blue)
   {
    this.xCoord = xCoord;
    this.yCoord = yCoord;
    this.diameter = diameter;
     colour(red, green, blue);
   }

   void display()
   {
     ellipse(xCoord, yCoord, diameter, diameter);
   }

  void colour(int red, int green, int blue)
  {
    this.red = red;
    this.green = green;
    this.blue = blue;
    fill (this.red, this.green, this.blue);
  }

  void colour(int gray){
    this.gray = gray;
    fill (this.gray);
  }

   void move(float xCoord, float yCoord)
   {
     this.xCoord = xCoord;
     this.yCoord = yCoord;
   }
}
No other changes are necessary.
Run your code. It should behave in the same way at V6.0 above.
Save your work (don't close the project though).
Setters and Getters
In this step, we will make the fields in Spot private and then introduce the setter and getter methods. This will allow us implement the encapsulation rules in our class.
Spot V7.0
Save your Spot_Version6_1 work as Spot_Version7_0.
Refactor your Spot class so that the fields have private access and it has the following setter and getter methods:
class Spot {

  private float xCoord, yCoord;
  private float diameter;
  private int red, green, blue, gray;

  //------------------//
  //   constructors   //
  //------------------//

  Spot()
  {
  }

  Spot(float xCoord, float yCoord, float diameter)
  {
    this.xCoord = xCoord;
    this.yCoord = yCoord;
    this.diameter = diameter;
  }

  Spot(float xCoord, float yCoord, float diameter, int gray)
  {
    this.xCoord = xCoord;
    this.yCoord = yCoord;
    this.diameter = diameter;
    colour(gray);
  }

  Spot(float xCoord, float yCoord, float diameter, int red, int green, int blue)
  {
    this.xCoord = xCoord;
    this.yCoord = yCoord;
    this.diameter = diameter;
    colour(red, green, blue);
  }

  //------------------//
  //     methods      //
  //------------------//

  void display()
  {
    ellipse(xCoord, yCoord, diameter, diameter);
  }

  void colour(int red, int green, int blue)
  {
    this.red = red;
    this.green = green;
    this.blue = blue;
    fill (this.red, this.green, this.blue);
  }

  void colour(int gray) {
    this.gray = gray;
    fill (this.gray);
  }

  void move(float xCoord, float yCoord)
  {
    this.xCoord = xCoord;
    this.yCoord = yCoord;
  }

  //------------------//
  //     getters      //
  //------------------//
  public float getDiameter() {
    return diameter;
  }

  public float getXCoord() {
    return xCoord;
  }

  public float getYCoord() {
    return yCoord;
  }

  public int getRed() {
    return red;
  }

  public int getGreen() {
    return green;
  }

  public int getBlue() {
    return blue;
  }

  public int getGray() {
    return gray;
  }

  //------------------//
  //     setters      //
  //------------------//
  public void setDiameter(float diameter) {
    this.diameter = diameter;
  }

  public void setXCoord(float xCoord) {
    this.xCoord = xCoord;
  }

  public void setYCoord(float yCoord) {
    this.yCoord = yCoord;
  }

  public void setRed(int red) {
    this.red = red;
  }

  public void setGreen(int green) {
    this.green = green;
  }

  public void setBlue(int blue) {
    this.blue = blue;
  }

  public void setGray(int gray) {
    this.gray = gray;
  }

}
and then in the main tab, refactor the draw() method to:
Spot sp;

void setup()
{
  size (100,100);
  noStroke();

  sp = new Spot(33, 50, 30);
  println("After constructor, the value of the diameter is " + sp.getDiameter());

  // Now change the value of the diameter
  sp.setDiameter(40);
  println("After setter, the value of the diameter is " + sp.getDiameter());
}

void draw()
{
  background(0);
  sp.colour(255,0,0);
  sp.display();
}
Examine the Spot code i.e. the getters and setters. Note what each of the methods do, their naming convention and return values etc.
Run this code.
Your console output should be:
After constructor, the value of the diameter is 30.0
After setter, the value of the diameter is 40.0
Have a look at your code. Are you happy that you understand how this output was produced?
Save your work (don't close the project though).
Setters and Getters - validations
In this step, we will add some validation to our diameter field.
Spot V7.1 - Using validation in constructors
Save your Spot_Version7_0 work as Spot_Version7_1.
Refactor the following Spot Constructor so that it validates the diameter field.
Spot(float xCoord, float yCoord, float diameter)
  {
    this.xCoord = xCoord;
    this.yCoord = yCoord;
    if ((diameter >= 20) && (diameter <= 50)){
       this.diameter = diameter;
    }
    else{
       this.diameter = 20;
    }
  }
This code will only allow values of between (and including) 20 and 50 into the diameter field. If values outside this range are sent in via the parameter, then the value of 20 is assigned to the diameter field (using the else clause).
To see this validation in action, refactor the setup method in the main tab to:
Spot sp;

void setup()
{
  size (100,100);
  noStroke();

  //constructor (float, float, float) test
  sp = new Spot(33, 50, 30000);
  println("The value of diameter is : "+ sp.getDiameter());

}

void draw()
{
  background(0);
  sp.display();
  sp.move(mouseX,  mouseY);
}
Try to run the code. You should see the following line in the console screen:

Data Integrity
We have diameter validation in one constructor, but we can see that the diameter is updated in other constructors:
  //------------------//
  //   constructors   //
  //------------------//

  Spot()
  {
  }

  Spot(float xCoord, float yCoord, float diameter)
  {
    this.xCoord = xCoord;
    this.yCoord = yCoord;
    if ((diameter >= 20) && (diameter <= 50)) {
      this.diameter = diameter;
    } else {
      this.diameter = 20;
    }
  }

  Spot(float xCoord, float yCoord, float diameter, int gray)
  {
    this.xCoord = xCoord;
    this.yCoord = yCoord;
    this.diameter = diameter;
    colour(gray);
  }

  Spot(float xCoord, float yCoord, float diameter, int red, int green, int blue)
  {
    this.xCoord = xCoord;
    this.yCoord = yCoord;
    this.diameter = diameter;
    colour(red, green, blue);
  }
It is also updated in the mutator.
  public void setDiameter(float diameter) {
    this.diameter = diameter;
  }
We have compromised our data integrity...diameter may or may not be between the right boundaries, depending on which constructor/mutator we call. We have to fix this!
Copy and paste the constructor diameter validation into all constructors that update diameter:
  Spot(float xCoord, float yCoord, float diameter)
  {
    this.xCoord = xCoord;
    this.yCoord = yCoord;
    if ((diameter >= 20) && (diameter <= 50)) {
      this.diameter = diameter;
    } else {
      this.diameter = 20;
    }
  }

  Spot(float xCoord, float yCoord, float diameter, int gray)
  {
    this.xCoord = xCoord;
    this.yCoord = yCoord;
    if ((diameter >= 20) && (diameter <= 50)) {
      this.diameter = diameter;
    } else {
      this.diameter = 20;
    }
    colour(gray);
  }

  Spot(float xCoord, float yCoord, float diameter, int red, int green, int blue)
  {
    this.xCoord = xCoord;
    this.yCoord = yCoord;
    if ((diameter >= 20) && (diameter <= 50)) {
      this.diameter = diameter;
    } else {
      this.diameter = 20;
    }
    colour(red, green, blue);
  }
Paste the constructor diameter validation into the diameter mutator and remove the else clause:
  public void setDiameter(float diameter) {
   if ((diameter >= 20) && (diameter <= 50)) {
      this.diameter = diameter;
    }
  }
A note on setters:
- We use setters as the safe way to change the values of fields after the object has been created.
- We typically use the same validation rules that we applied in the constructor...except...there typically is no else in the if statement. This means that if the parameter is not in the correct range, then the diameter field will remain unchanged. Where feasible, this is the convention we use for this module.
Testing the grayscale constructor and the mutator
To test your grayscale constructor and the mutator code, refactor your setup method in the main tab to:
void setup()
{
  size (100, 100);
  noStroke();

  //grayscale constructor test
  sp = new Spot(33, 50, 30000, 200);
  println("After grayscale constructor, the value of the diameter is " + sp.getDiameter());
  sp.setDiameter(40000);    // changing the value of the diameter
  println("After setter, the value of the diameter is " + sp.getDiameter());

}
Run your code. The console output should be:
After grayscale constructor, the value of the diameter is 20.0
After setter, the value of the diameter is 20.0
Testing the rgb constructor and the mutator
To test your rgb constructor and the mutator code, refactor your setup method in the main tab to:
void setup()
{
  size (100, 100);
  noStroke();

  //rgb constructor test
  sp = new Spot(33, 50, 30000, 200, 0, 0);
  println("After rgb constructor, the value of the diameter is " + sp.getDiameter());
  sp.setDiameter(40000);    // changing the value of the diameter
  println("After setter, the value of the diameter is " + sp.getDiameter());

}
Run your code. The console output should be:
After rgb constructor, the value of the diameter is 20.0
After setter, the value of the diameter is 20.0
Save your work and close the project.
Repeating code...
You may have noticed that we have repeated the same validation in many places in the above code. This is not the best approach at all. What would happen if we decided to change the diameter boundaries of the Spot from 20:50 to 20:100? You would have to remember to change it in four places. That's a lot of remembering and this is where bugs sneak in...what if we forgot to change one of the checks?
A key mantra to remember when coding...use the DRY approach...Don't Repeat Yourself. However, we have a bit of work to do before we move down this path. Later in the module, we will show a different approach to avoid this scenario and adhere to DRY principles.
Exercise
Exercise 1
Using Spot Version 7.1 as a starting point, save this as lab04b_exercise_01.
Implement these validation rules in the relevant constructors and setters:
- xCoord and yCoord values must be in the range 0..100.
- if an invalid value is supplied at constructor level, give a default of 50.
- if an invalid value is supplied at setter level, don't default.
For testing, use the same appraoch we applied to testing the diameter validation.
DRY principle
Now you can really see how we have repeated ourselves throughout our code. As we become more familiar with Java, we will working on writing utility / helper methods to reduce this repetition!
Challenge
Challenge 1
Using your latest working version of the Spot project as a starting point or our solution to the previous exercise, save it as lab04b_challenge_01.
In Spot, write a method called grow that takes in one float parameter (growthPixels). The return type of this method is void.
In the main tab, in the draw method, call the grow method, passing out a value as a parameter.
Run your code. If you passed a positive number in grow, you should see your circle growing each time the draw() method is called, if you passed a negative value, you should see your circle shrinking. To verfiy that the diameter is changing, you could print out the value stored in it (using getDiameter).
Data Integrity: Did you consider data integrity when writing the draw method? What we mean by this is...else where in the Spot class, we restricted the diameter to a range of 20 to 50 inclusive. Did you remember to do this in the new method, grow? If not, refactor your method to make sure that the diameter doesn't breach these bounds.
Solutions
The solutions for this lab can be found here.
If you require unzipping software, 7zip is a good choice: http://www.7-zip.org/ (or Keka for Mac http://www.kekaosx.com/en/)
After unzipping the solutions, it might be a good idea to copy the folders to your sketchbook folder. From Processing, you could then use File, followed by Sketchbook to easily open them.